
Photo: Stock Photos from Valentina Razumova/Shutterstock
This post may contain affiliate links. If you make a purchase, My Modern Met may earn an affiliate commission. Please read our disclosure for more info.
If you’re on a quest to learn how to draw the human face, it’s important that you know how to sketch each feature on its own. Doing this will allow you to tackle every part of the face with ease and ensure that each characteristic gets the attention that it deserves.
When it comes to portrait drawing, lips might be an afterthought. But, let’s face it: they do a lot more than help us to speak and sing. Lips are also a way to express ourselves without having to say words. Think about puckering your lips or moving your mouth to form a grimace. Those expressions say a lot! So if you want to convey emotion in your art, it’s important that you learn how to draw lips.
Lips might seem like an easy thing to draw—and when it comes to other facial features, they are on the simpler side—but because they are easier, you’ll want to focus on getting every element exactly correct and taking ample time to observe both upper and lower lips.
This step-by-step drawing tutorial will show you how to draw lips in pencil from multiple points of view: straight on, three-quarters, and profile (side).

Photo: Stock Photos from marinafrost/Shutterstock
General Things to Note About the Mouth
- The upper lip will always be a bit thinner than the bottom lip.
- The lower lip often has a highlight since it is visually in front of the upper lip. This means it might be slightly darker.
- The opening of the mouth will not be a straight line. Watch how it curves in the center—especially when you’re looking at it from a three-quarter or side view.
Before you begin your tutorial, make sure you have your essential art supplies handy. You’ll want to have at least a couple of pencils of varying graphite tones, a vinyl eraser, and a sketchpad.
Step 1: Draw the opening of the mouth and general shape of the upper and lower lips.
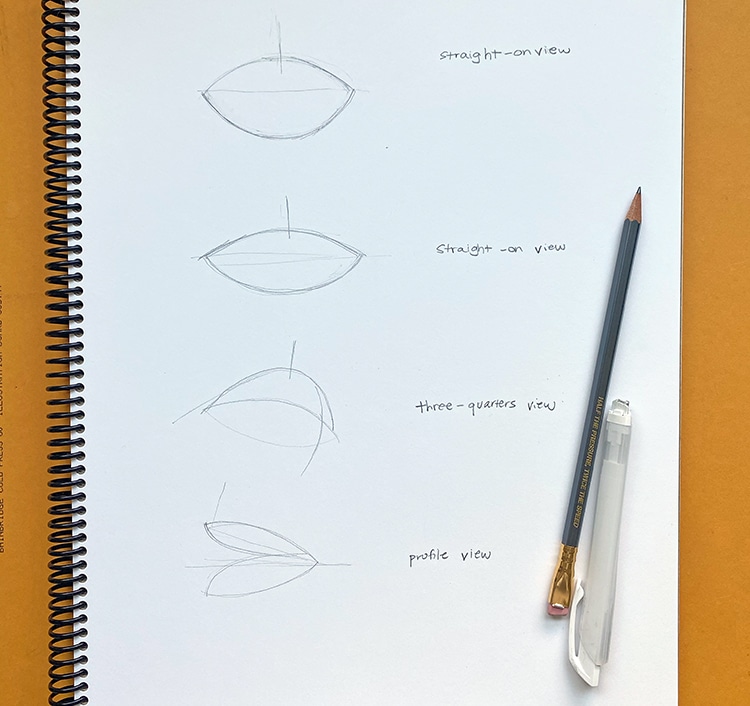
Photo & Art: Sara Barnes / My Modern Met
The first step of any drawing is to start with the most basic shapes—regardless of the point of view that you’re trying to capture.
At this stage, it’s more important to make a lot of light marks and to get things situated in the right area. Don’t be overly concerned with the fine details (yet); instead, look at the overall shape of the lips and mouth opening. To do this, really study your source drawing. What direction is the mouth line? Is it straight across or does it curve? And if so, how much? Once you have that, notice how thick (or thin) the upper and lower lips are and then make oval shapes at the line.
Step 2: Refine your initial drawings.
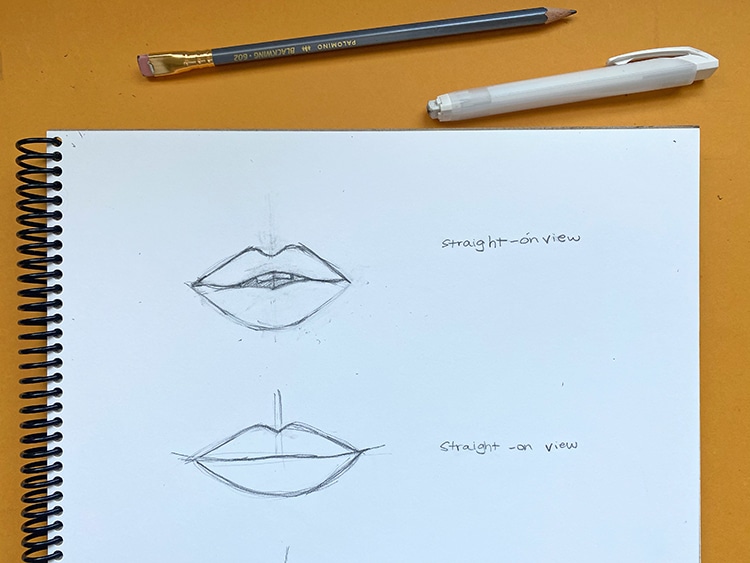
Photo & Art: Sara Barnes / My Modern Met
Once you’ve determined the overall shape of the lips, begin to refine what you initially drew. Think of yourself as a sculptor who is chiseling away at a blocky form to express the nuances of the lips.
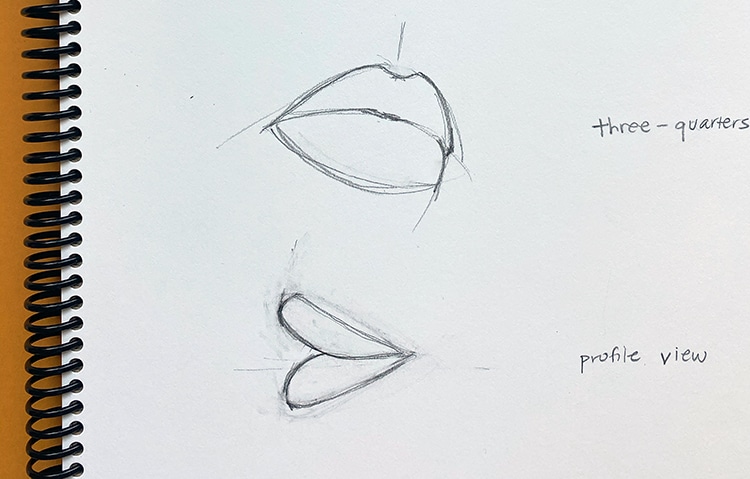
Photo & Art: Sara Barnes / My Modern Met
There will be parts that are plumper than others, while other areas will be thinner. With your eye, trace the line of the lips—being sure to pay attention to the opening of the mouth—and render what you see onto paper.
Step 3: Block out the shadows.
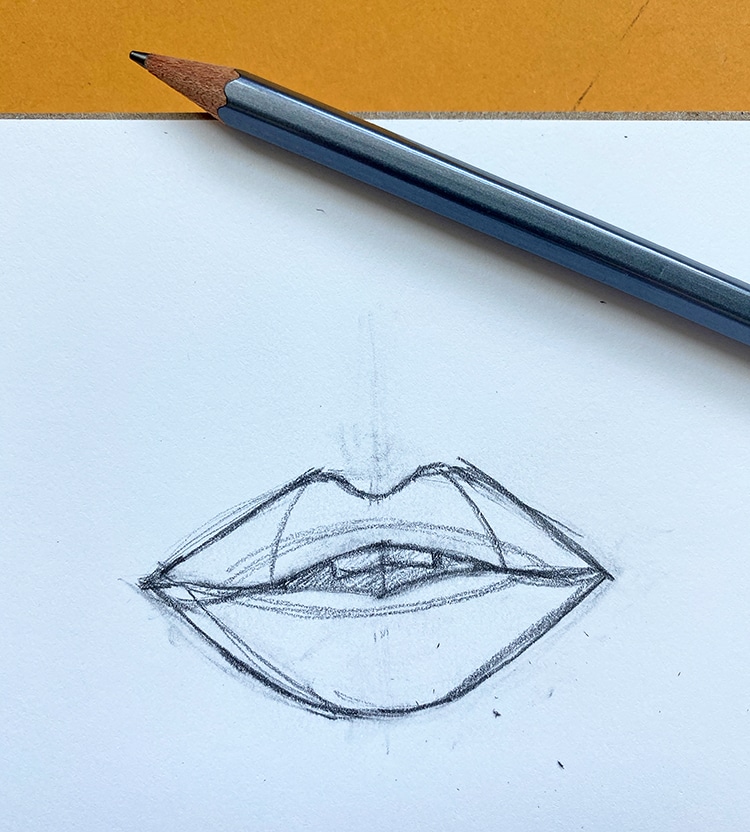
Photo & Art: Sara Barnes / My Modern Met
With the shape of your lips refined, it’s time to start thinking about the shadows. Because it’s harder to erase areas of pencil shading than it is some light pencil lines, observe where the shadows fall and their general shape. Mark it on your drawing. You might see a highlight—probably in the center of the bottom lip—so mark that on your paper, too.
Step 4: Add some shading.
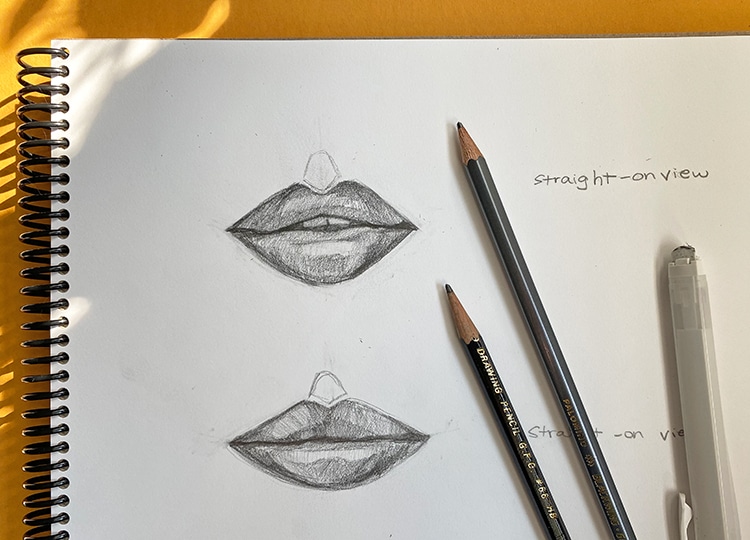
Photo & Art: Sara Barnes / My Modern Met
Now that you have the shading planned, it’s time to start adding it to your drawing. As you apply grayscale values to the lips, use the drawing technique of the back-and-forth method to layer the graphite.
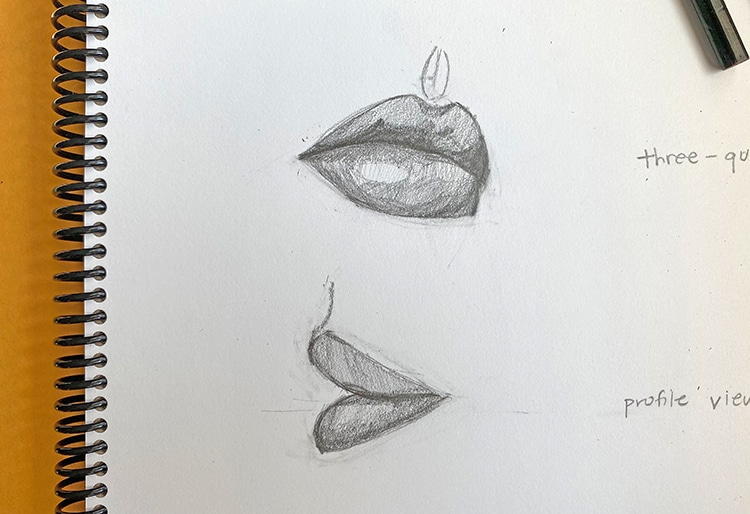
Photo & Art: Sara Barnes / My Modern Met
As with all drawings, you’ll want to start with the lighter tones and build to the darker tones. Once an area has reached its correct tone, continue to shade the lips moving onto the areas that are in deeper shadow.
To convey the plumpness of some lips, try creating curved pencil strokes as you shade. It will give the sketch an additional feeling of three-dimensionality.
Now that you know how to draw lips, continue your lessons in face drawing by checking out our guides for sketching the nose and the eyes.
Build on Your Lip Drawing Skills
The human face is one of the most complex drawing subjects. Explore facial features in this step-by-step online class, Portrait Drawing for Beginners on My Modern Met Academy. The bite-sized lessons in this course will break down all of the facial muscles and landmarks in a simple and approachable way. Join instructor Melissa de Nobrega and learn more about the human face and how to artistically render it as you create your very own portrait.
Looking for others who love drawing? Join our Art, Design, Photography, and Drawing Club on Facebook!
This article has been edited and updated.
Related Articles:
Build Your Drawing Foundation When You Learn How to Draw a Skull
Talented Artists Share Their Favorite Tips for Improving Your Drawing Skills
10 Drawing Books That’ll Teach You Everything You Need to Know About Sketching

