Embroidered clothing can take regular garments from being ordinary to extraordinary. Hand embroidery, in particular, can customize solid-color clothing and turn basic silhouettes into wearable art. The possibilities are endless; by stitching bunches of flowers on a tank top, you can literally wear a bouquet on your body. Likewise, you can craft whimsical fashions when you sew creatures that seemingly run amok over a t-shirt.
Embroidering clothing by hand often takes much longer than doing it on a machine, but there’s greater freedom in design. You can vary the type of stitches you use; while the satin stitch is common, artists like Trini Guzmán use knotted stitches to create a sculptural effect on the shoulders of a jacket. It’s also easier to vary the length of a stitch. In doing so, it will give the garment a painterly look; this is Lisa Smirnova’s style, and as a result, her clothing has the appearance of an Impressionist painting.
How to Embroider Clothes
It’s easier than you think to embroider your own clothes; when you do, you’re carrying on the ancient tradition of textile art. So, why not give it a try? There are a few ways approaches you can take, depending on your level of familiarity with embroidery.
Transfer Approach
This method is ideal for beginners, but it works well for seasoned stitchers, too. Essentially, you are drawing a design on a specially-treated paper and then placing it on an area of the garment. Using heat or special pens, you then transfer the image onto the fabric.
DMC sells Magic Paper that’s so easy to take from paper to fabric, it really feels like magic. They offer more than 70 designs on this special paper. To begin, cut out the image and stick it on the fabric. Then, start stitching; the Magic Paper is so lightweight that it seamlessly blends into the fabric. When complete, dip the garment in water to dissolve the paper.
Magic Paper isn’t the only option for transfer. Blank tracing paper is also available if you’d like to create your own design, or download a hand embroidery pattern and use that. In either case, you’d draw the line art onto the paper and then follow the instructions to transmit it on fabric.
Freehand Approach
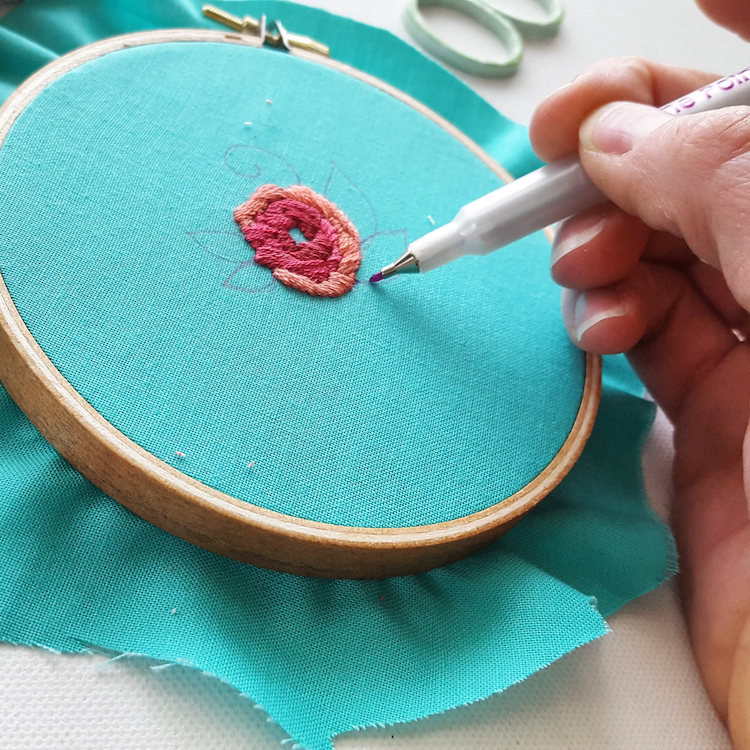
This approach is great for those who are completely comfortable with a needle and floss. To do this, use a special utensil to draw your design directly onto the fabric—preferably one that will easily wash off. A tailor’s chalk pencil or a water-soluble chalk marking pencil will both disappear with water or on their own after a couple of days. Likewise, a disappearing ink marking pen will do the same.

Photo: Namaste Embroidery
Once you’ve got your design laid out, start stitching. Sometimes, it’s easier to outline your design with a simple back stitch—especially if you anticipate that it will take you a while, and you don’t want your chalk or ink to wear off.
If you find that you need to make adjustments to the drawing once you’ve started, it’s easy to do so using either one of those tools.
