
Photo credit: Twin Design / Shutterstock. This post may contain affiliate links. Please read our disclosure for more info.
For almost a decade, we here at My Modern Met have had the distinct pleasure of working with many talented artists, designers, and photographers by interviewing them and sharing their work. We’ve seen countless creatives reach great levels of success and even helped catapult a few blossoming careers. What is one thing that they all had in common? They had a blog.
Having a blog is a fantastic tool for marketing because it’s a simple way to let your fans (and potential clients) know about your current projects. You can update it as much as you please and showcase your expertise on a subject to build your following and influence.
Essential for any creative, getting started can be the biggest step but it really isn’t difficult. In fact, we’ve created an easy step-by-step guide for you.
There’s only one blogging platform that we wholeheartedly recommend: WordPress. A WordPress blog is easy to learn and extremely customizable — it can be tailored to your exact needs. It’s what we use here at My Modern Met, and we love the flexibility that it offers.
You don’t need to be tech wiz to create your own WordPress blog. It can be done in just three easy steps!
Here’s a quick preview of how to create a blog:
- Pick your domain name and buy hosting.
- Install WordPress in just one click.
- Pick a theme and have fun!
Doesn’t that seem simple?
Step 1: Pick your domain name and buy hosting.
This is arguably the hardest part of the whole process. Picking the perfect domain can take time. You might want the site to be just your name, or you could get creative and think of a slick URL. Regardless, it should reflect who you are and the blog you’re building.
Once you’ve brainstormed a bunch of names, it’s time to buy the domain. We recommend using Bluehost for this. We’ve used them in the past and had a great experience with them. Plus, they’ve streamlined the process to make domain name and hosting a cinch.
One of the best parts about using Bluehost is the great deal they have now. When you buy hosting—which, per month, is as cheap as a Starbucks latte—you get your domain for free. On other sites, your domain could easily be $10 or more a year.
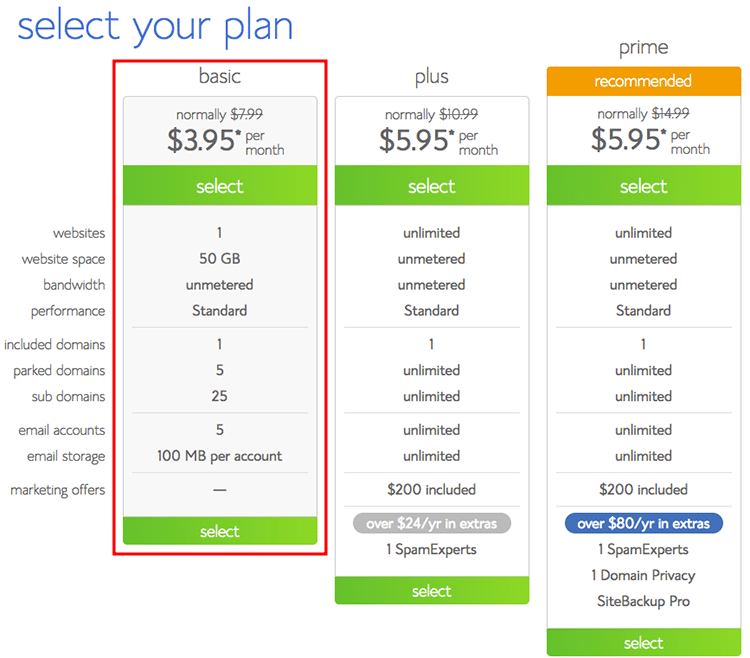
When you begin the process of buying your domain name, you’ll first be asked to select a hosting plan. Since you’re just getting started, you’ll probably be fine with the basic package. It has exactly what you need: a domain, a place to put your content, and up to five available email address. (Another step to sounding more professional is having [email protected].) You can always upgrade later if you need to.
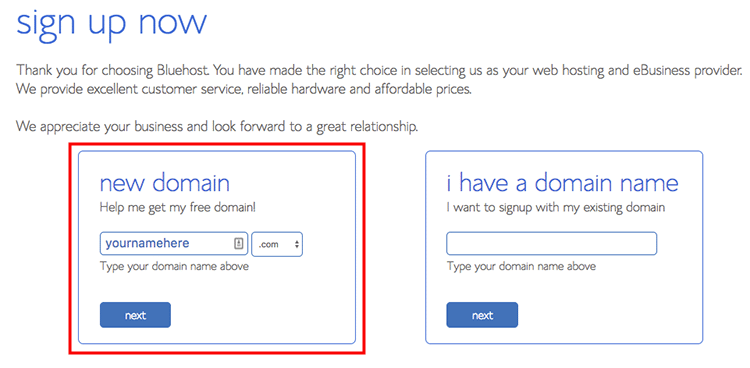
After you’ve selected your hosting plan, the next screen will let you pick your domain. In the “New Domain” box, type the name you want. Then, you can customize your package.
 Bonus: You can check for available domain names right now using this tool:
You probably won’t need most of these extras. If you’re concerned about privacy, however, you should add Domain Privacy Protection for a little bit more a month. This conceals your contact information (like address and phone number) from public view.
Step 2: Install WordPress in a single click.
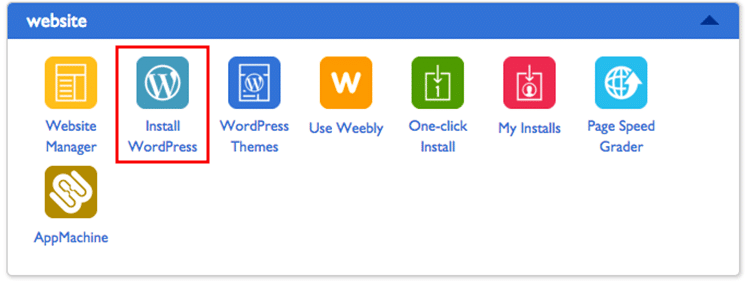
Once you’ve registered your domain and hosting with Bluehost, it’s time to install WordPress. Login to your account and scroll to the Website section. Select “Install WordPress.”
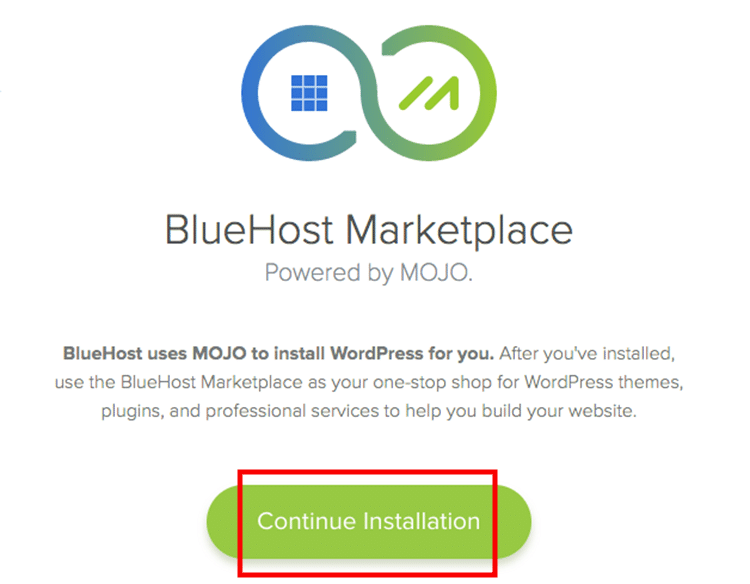
Then, on the next screen, click on the button that says “Continue Installation.”
Under the section at the top that says “Select domain for installation,” pick the domain that you want to install WordPress on. (It should be the one that you just bought.) Click “Next.”
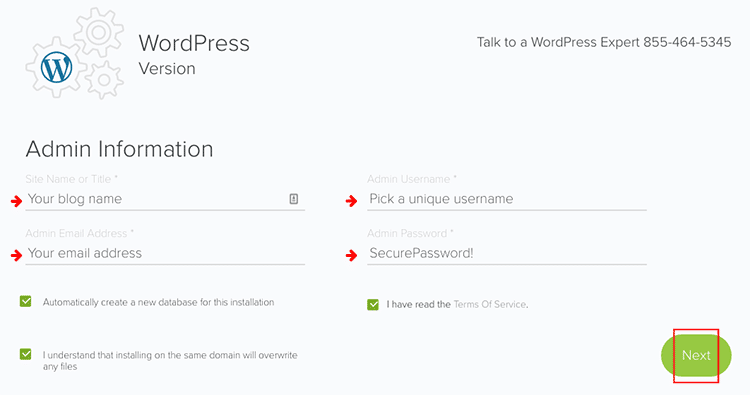
From here, you’ll enter your admin information. This will be your credentials for entering your WordPress blog. You’ll enter in your blog name, username, password, and email address in the fields. These things can all be changed later if necessary. Keep all the boxes checked and click “Next.”
The next screen will install your WordPress blog! As you wait, Bluehost is setting up your login, as well as the more more technical side of your blog—like the database where all your posts will live.

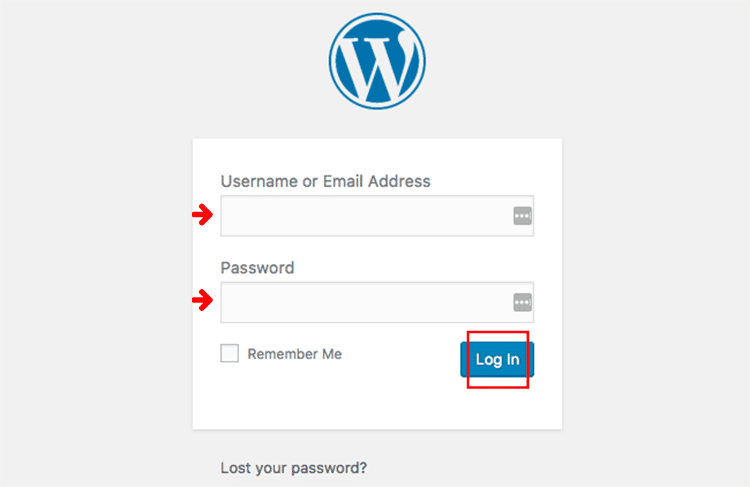
Bluehost will tell you that the WordPress install is complete and you can then “View your credentials,” which includes a link to the login screen for your blog. Enter in your username and password and take WordPress for a test drive.
Step 3: Make your blog look great with themes.
Once you’ve gotten familiar with WordPress, you can customize the way your blog looks. WordPress comes with its own default themes—and they’re good—but you can get more stylish with custom-built themes. Often, these have a price tag attached, but for a small amount of money you can get a theme that will work for exactly your needs. Maybe you want big images that look great on mobile, too. Or, you want your blog to feel like an online magazine. You can find a variety of accommodating layouts on Elegant Themes or StudioPress.
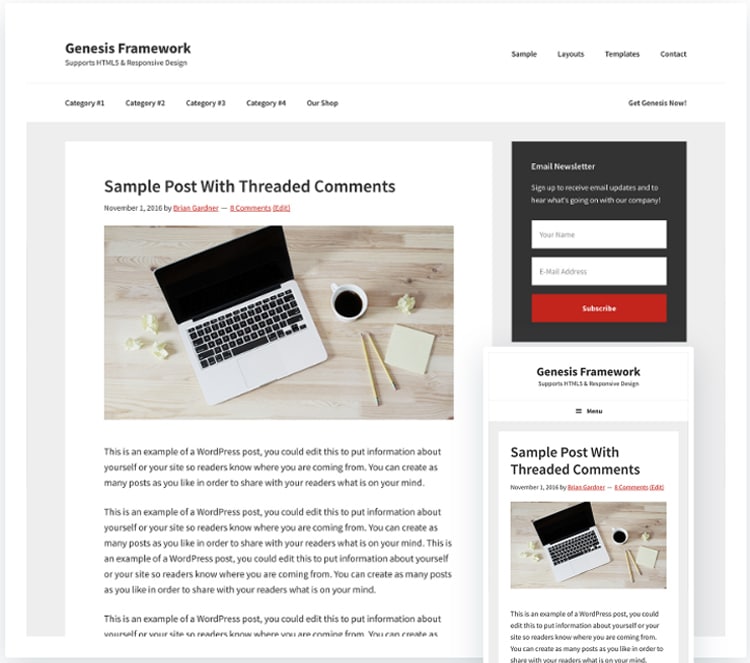
We’re fans of Genesis Framework by StudioPress. It’s responsive (meaning it easily sizes from desktop to mobile) and is optimized for search engines. The latter is important—it helps people find you when they search on the web.
Once you find and purchase a theme, you’ll download it. WordPress makes it easy to upload. Just log in to your blog, find the “Appearance” tab on the side and hover over it. Click “Themes.”
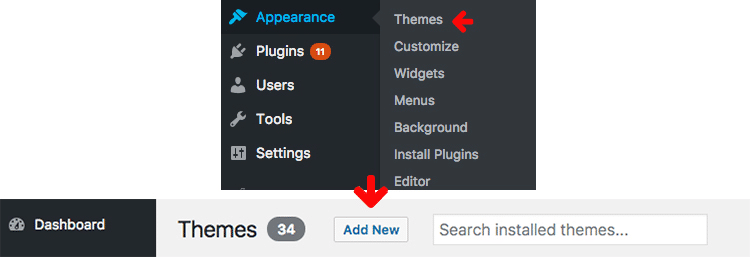
Then, click on the “Add New” button near the top of the screen. From there, click “Upload Theme,” and it’ll drop down an area to upload your downloaded theme. Just choose the .zip file from your computer and select “Install Now.” WordPress will do the whole thing for you.

Go back to the “Themes” screen, and you’ll see all the templates available for use. Hover over the one you just installed and click “Activate.” The next time you visit your blog, you’ll see your new theme!
